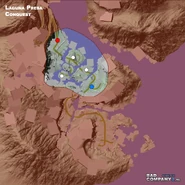
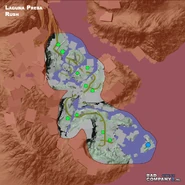
Laguna Presa is a location in Chile. The valley and surrounding mountains possess a strategic value in the battle for South America. Construction of the nearby Dam by the Russians was halted when hostilities broke out, but its presence is still a significant factor. Airborne operations are limited but infantry assault supported by light armor vehicles is likely by both armies. Russian Forces are massing all available units to stage a defense against a US assault on the facility, and have wired the dam to prevent it from falling into American hands. The map is available in Rush, Conquest and Squad Deathmatch.
Conquest
The Conquest Variant of the map is near the dam, each team has 100 reinforcement tickets.
Equipment
RU
Light Vehicles
Tanks/APCs/IFVs
Helicopters
- Mil Mi-24 Hind (Prop)
- Mil Mi-28 Havoc (Prop)
- UAV-1 (Has to be captured)
Naval Units
- Personal Water Craft (Has to be Captured)
Emplacements
- None
US
Light Vehicles
Tanks/APCs/IFVs
Helicopters
Aircraft
- None
Naval Units
- Personal Water Craft (Has to be captured)
Emplacements
- None
Bases
RU Deployment
A: Crash Site
B: Hill
C: Village
US Deployment
Rush
Equipment
RU
Light Vehicles
- None
Tanks
- None
Helicopters
- Mil Mi-24 Hind (Prop)
Aircraft
- None
Naval Units
- None
Emplacements
US
Light Vehicles
Tanks
Helicopters
Aircraft
- None
Naval Units
- x1 Iowa Class Battleship (Prop)
- x2 Oliver Hazard Perry frigates (Props)
- Large Patrol Boat (Props)
- Patrol Boat
- Jet Ski
Emplacements
- None
Bases
Attackers Deployment
The attackers deployment is an island set far out from the mainland of Laguna Presa with with another island between the two. The attackers deployment contains a UAV and a number of patrol boats and personal watercraft, and is a good place for long range snipers to weaken the front-line defenses on the mainland, especially the Kornett which will wreak havoc on landing forces. The island between the attackers deployment and the mainland is an excellent place for snipers to support their landing forces. The UAV plays an essential role in guiding the attackers to the weak spots on the beaches and should stay safe while spotting enemies. Attackers can set a patrol boat parallel to the shore allowing both of the grenade launchers to bombard the beaches, supporting ground forces.
Village
Because the attackers start so far out, the time for them to reach the shore greatly augments the ability of defenders to prepare fortifications to hold off the first and usually strongest wave of attackers. Attackers most successful strategy is a shock and awe capture of one objective while then regrouping forces to do the same for the other. Attackers must be ware of traps placed on the shores because these are usually lined with C4 and AT mines to prevent pesky assault boats from running up on the shore and being used as stationary turrets. The defenders should focus on holding the small wood between the two objectives which is easy to defend and looks down on both objectives. Destroying all buildings near the waterline can greatly aid defenders in gunning down attackers as they land, and prevent any enemies from flanking then spawning their squads. If the attackers have nearly captured a position it is advisable to salvage any assault boats available and move up the rivers to the second objective. Assault boats can be navigated through the rivers of the entire map so saving them from the begining can yield devastating results at later, more difficult objectives.
Waterfall
The greatest advantage for attackers here is a cliff overlooking each of the objectives which is only acessable from a ramp encircling the hillside beginning at the american deployment. Snipers here can weaken enemy defenses and lay down suppressive fire while spawning squad-mates in a perfect position to view the battle and choose where to attack. Although it may improve the lines of sight for snipers on the cliff, the area is most defensible by destroying everything in sight to prevent attackers from sneaking forward. Because defenders have little room to fall back, the farther objective must usually be taken by stealth, and is often easier to destroy with C4 because this does not give the enemy a warning. Attackers will commonly have an assault boat saved from assaulting the first objectives that is used to weaken defenses on this point and are also given a M3A3 Bradley that is best used to transport troops to the objectives in safety. Assault boats are quite useful for taking these objectives but are even more devastating if saved for the fourth and fifth.
Bridge
The attackers are given a UAV, M3A3 Bradley, and Quad Bike and the defenders are given a 9M133 Kornet and a KORD. The defense centers around a large, destructible bridge spanning a deep gorge. Defenders should wait until the Bradley is on the bridge, or enemies begin to cross to destroy it, hopefully trapping the Bradley in the gorge. Once the bridge is destroyed, the attackers are forced to attack across the valley by a steep hill on the left of the bridge and a narrow switchback to the right, and the Bradley is confined to the confined path to the right which it drives up slowly. The attackers can use the bridgehead to drop down on the attackers advancing along either side to cut them off. Periodic forays across the gorge to eliminate snipers, plant mines, or destroy the attackers cover are generally successful. The only hope for attackers is heavy fire support from snipers to help advancing troops, or sneaking past attackers on the unused switchback on the right of the bridge to spawn teammates. The Bradley is nearly useless and has an incredibly short lifespan because it is confined while advancing and is virtually always surrounded by enemies. The Bradley is most effective when used to either bombard enemies from the opposite side of the bridge for which improved optics are useful, or when driven into the enemy base to wreak havoc to release passengers and cause havoc for which smoke screening is essential.
Islands
Last Stand
Outcome
RU Victory
Russian helicopters are seen flying over the dam followed by a series of sonic booms which are presumably from Russian aircraft flying overhead. The voice of a US soldier telling troops to fall back is also heard.
US Victory
A US soldier will be seen hitting a detonator followed by explosions that destroy the top level of the dam slowly releasing the water.
Tips
Conquest
- Try to have a sniper on the slope of hill that B is on. This will help incase it falls, since you can respawn on him and rush it.
Rush
- When the Attackers destroy the M-Com stations at the Waterfall, plant C4 on the wooden bridge leading to the next set of M-Coms. That way, if the enemy sends a Bradley or HMMVW over the bridge, you can destroy it easily.
- Mine the steep slope leading to the 3rd set of M-Coms, and destroy the wooden bridge as above. This allows the defending team to deny the attackers the use of the M3A3 Bradley and the HMMVW, as they are unable to get the vehicles up onto the plateau.
- Recon players armed with shotguns can wreak havoc in this map. The ghillie suit allows the player to hide in the bushes and trees, and would then be able to ambush enemy soldiers as they advance.
Map
| ||||||||||||||||||||


